by Zipbooks Admin
DIY Bookkeeping in 3 Easy Steps (with Examples)

You probably know at least one fact about bookkeeping already: it’s boring. Also, DIY bookkeeping can be a little intimidating.
Just be glad for computers. Bookkeepers used to hand write every transaction. They literally kept the books. Now, accounting software is a lot more forgiving of newbie mistakes than pen and paper.
DIY bookkeeping today can be broken into three easy steps that you can do at the end of every month: confirm transactions, reconcile bank statements, and run financial reports.
Step 1: Confirm transactions
Before you create financial statements for a certain time period, it’s important to assign your transactions for that time period to a category and verify that they’re accurate. If you entered every transaction manually, you could do this as you go. But, ideally, you’ll be importing transactions automatically from a bank data feed.
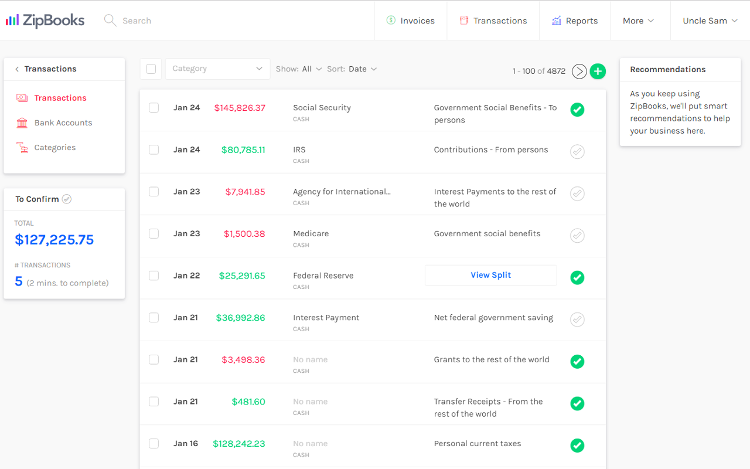
Here’s an example of what transactions look like in ZipBooks. The confirmed transactions have a green check mark on the right. Let’s take a look at one that isn’t confirmed yet.
Every accounting software program has a transactions list view where you can check to see if there are any unconfirmed transactions. You can see what this view looks like in ZipBooks below.

The number of transactions you still need to confirm is in blue below the main menu on the left.
In ZipBooks’ version of DIY bookkeeping, you can tell the difference between a confirmed and unconfirmed transaction because confirmed transactions show up with a green check mark on the right hand side and unconfirmed transactions have a check mark outlined in grey.
Transaction confirmation checklist
Once you’ve changed filters to show only confirmed check marks, you can go through transactions one by one. Here’s what we’re looking for:
Name: Check to make sure you recognize the vendor or merchant name.
Amount: Check the amount to make sure that it’s what you expected.
Date: Check for duplicate amounts with different dates for one transaction. This can happen if you recorded a transaction manually that also gets imported later from your bank account. In ZipBooks, you can consolidate both transactions into one by selecting each transaction and clicking the “Match” button.
Category: Categorize each transaction to make sure your reports are accurate. For example, a phone bill would be assigned to Expenses > Office expenses.
Once you’ve categorized and confirmed each transaction, you’ll want to make sure you didn’t miss anything before you officially close out the books at the end of the month.
Step 2: Reconcile bank statements
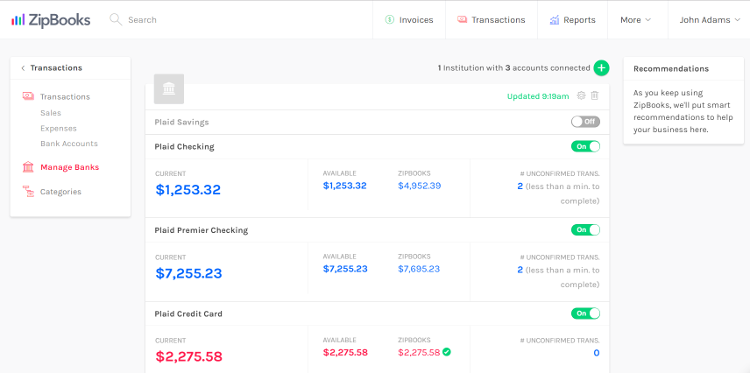
You have (at least) two records of your bank accounts. One record of your bank account will exist in your accounting software. The other record will be a digital or physical copy of your bank statement. Reconciliation is the process you go through to make sure that the balances match.

Common reasons numbers don’t add up
If the balances match, you can move on to generating your end-of-month reports. Otherwise, you’ll need to spend a little time figuring out where the discrepancies are. Here are three common things to check for:
Missing / duplicate transactions: Calculate the difference between the balance showing on your bank statement and your accounting program. It might be a clue as to where you should start looking for an error.
Human error: In some cases you will have to manually correct data that results in an erroneous amount. It’s also possible that you confirmed a transaction that wasn’t correct. For example, two numbers in the amount might be transposed.
Missing fees: If a client pays for an invoice with a credit card, make sure to split the payment between the amount that you keep and the expense that you have to pay to the credit card processor. (Shameless plug: ZipBooks Payments automatically does that for you.)
Once you’ve tracked down all your money and your bank account statement is reconciled against your financial records, you’re ready to start creating financial reports for the month.
Step 3: Run financial reports
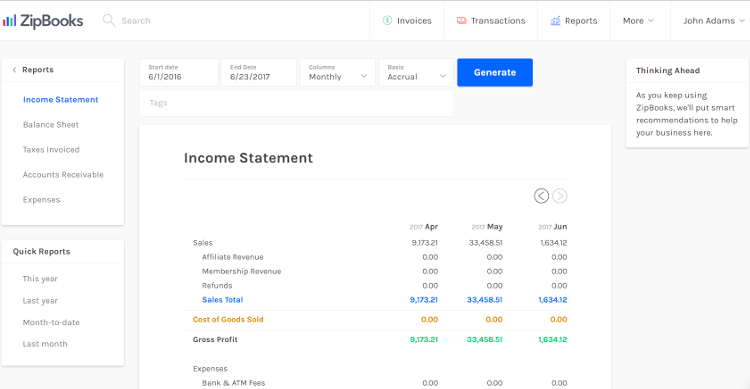
Financial reports can show how business profitability changes over time (income statement) and what your business is currently worth (balance sheet).

ZipBooks also includes a report to show you who owes you money (accounts receivable report), what taxes you’ve collected in the course of running your business (taxes invoiced), and an expense report so you know which business expenses are deductible based on the qualifying category.
If you don’t already have a ZipBooks account, you can get started here.